Intrinsic using tape measure
This type of calibration requires us to measure distance between two opposite points in camera view as well as distance from camera lens to those two points - giving us three measurements that we need to input into application. We want to be as precise with the measurements as we possibly can.
Calibration is performed for a specific resolution and zoom level. When this calibration file is later loaded into a device, the device will support only that particular resolution.
Unlike extrinsic calibration, intrinsic calibration needs to be done just once for the given settings and can be reused without any problems.
Before we begin, please prepare two markers that you will place in two opposite corners of a camera view. Those markers are only for you to help visualize the edges, we recommend a sticky notes with gibberish drawn on it or a masking tape. How to place those markers will be explained below.
Markers are not strictly necessary, we use them to mark certain points in the field of view. If your recording enviroment already have some distinguishable features like a non-repeating pattern on the wall they may be used instead. As measuring distances frequentrly involves help of another person you can also just ask them to hold a finger in a fixed place.
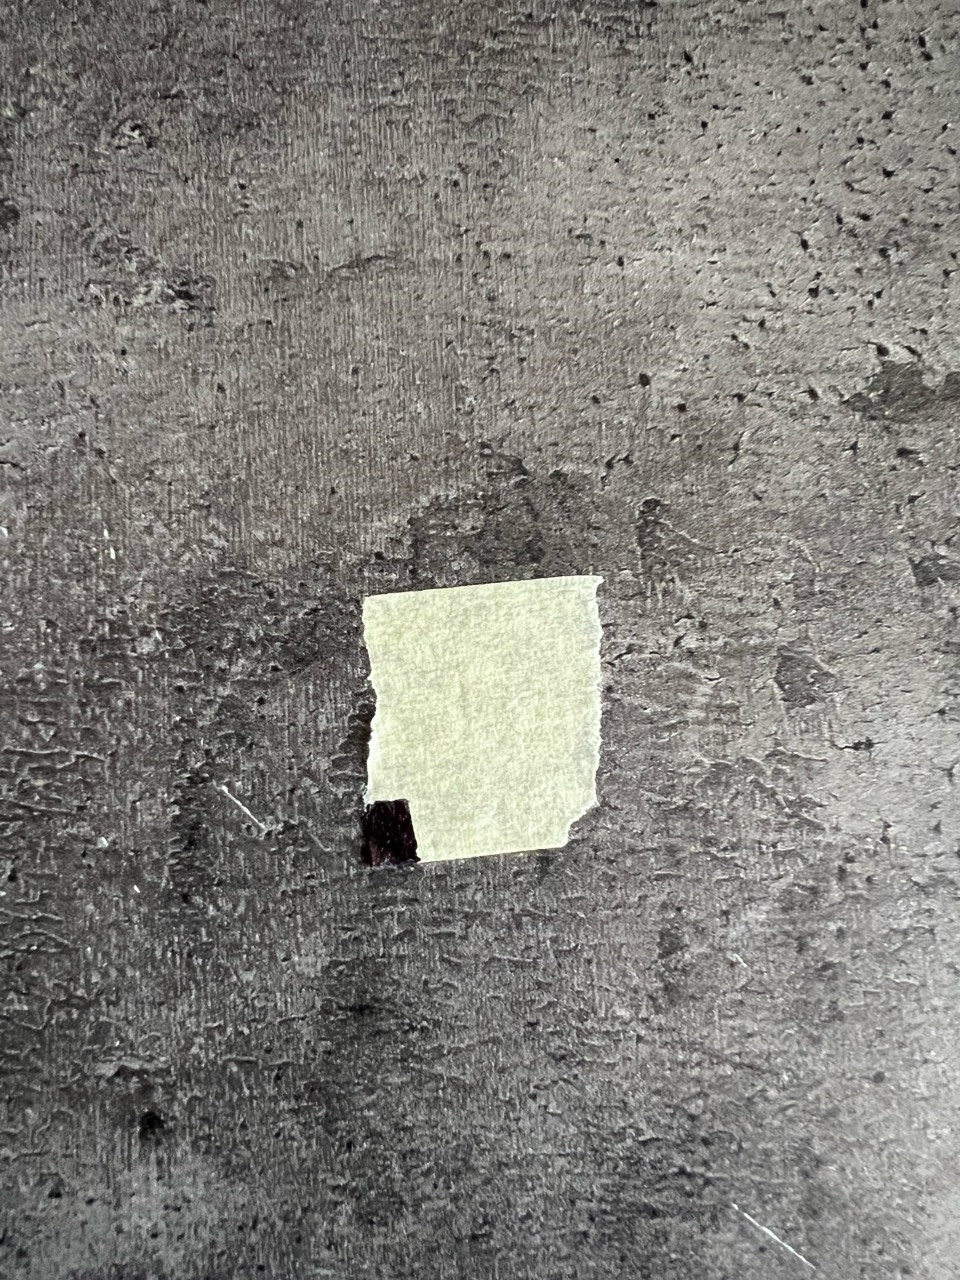
visible in the camera preview.
Open AImation Studio and navigate to Recording tab.
Enable the device you want to calibrate by clicking on the camera icon, select recording format (resolution) that you want to calibrate for and start a preview for the device ( Play button below resolution selector ).
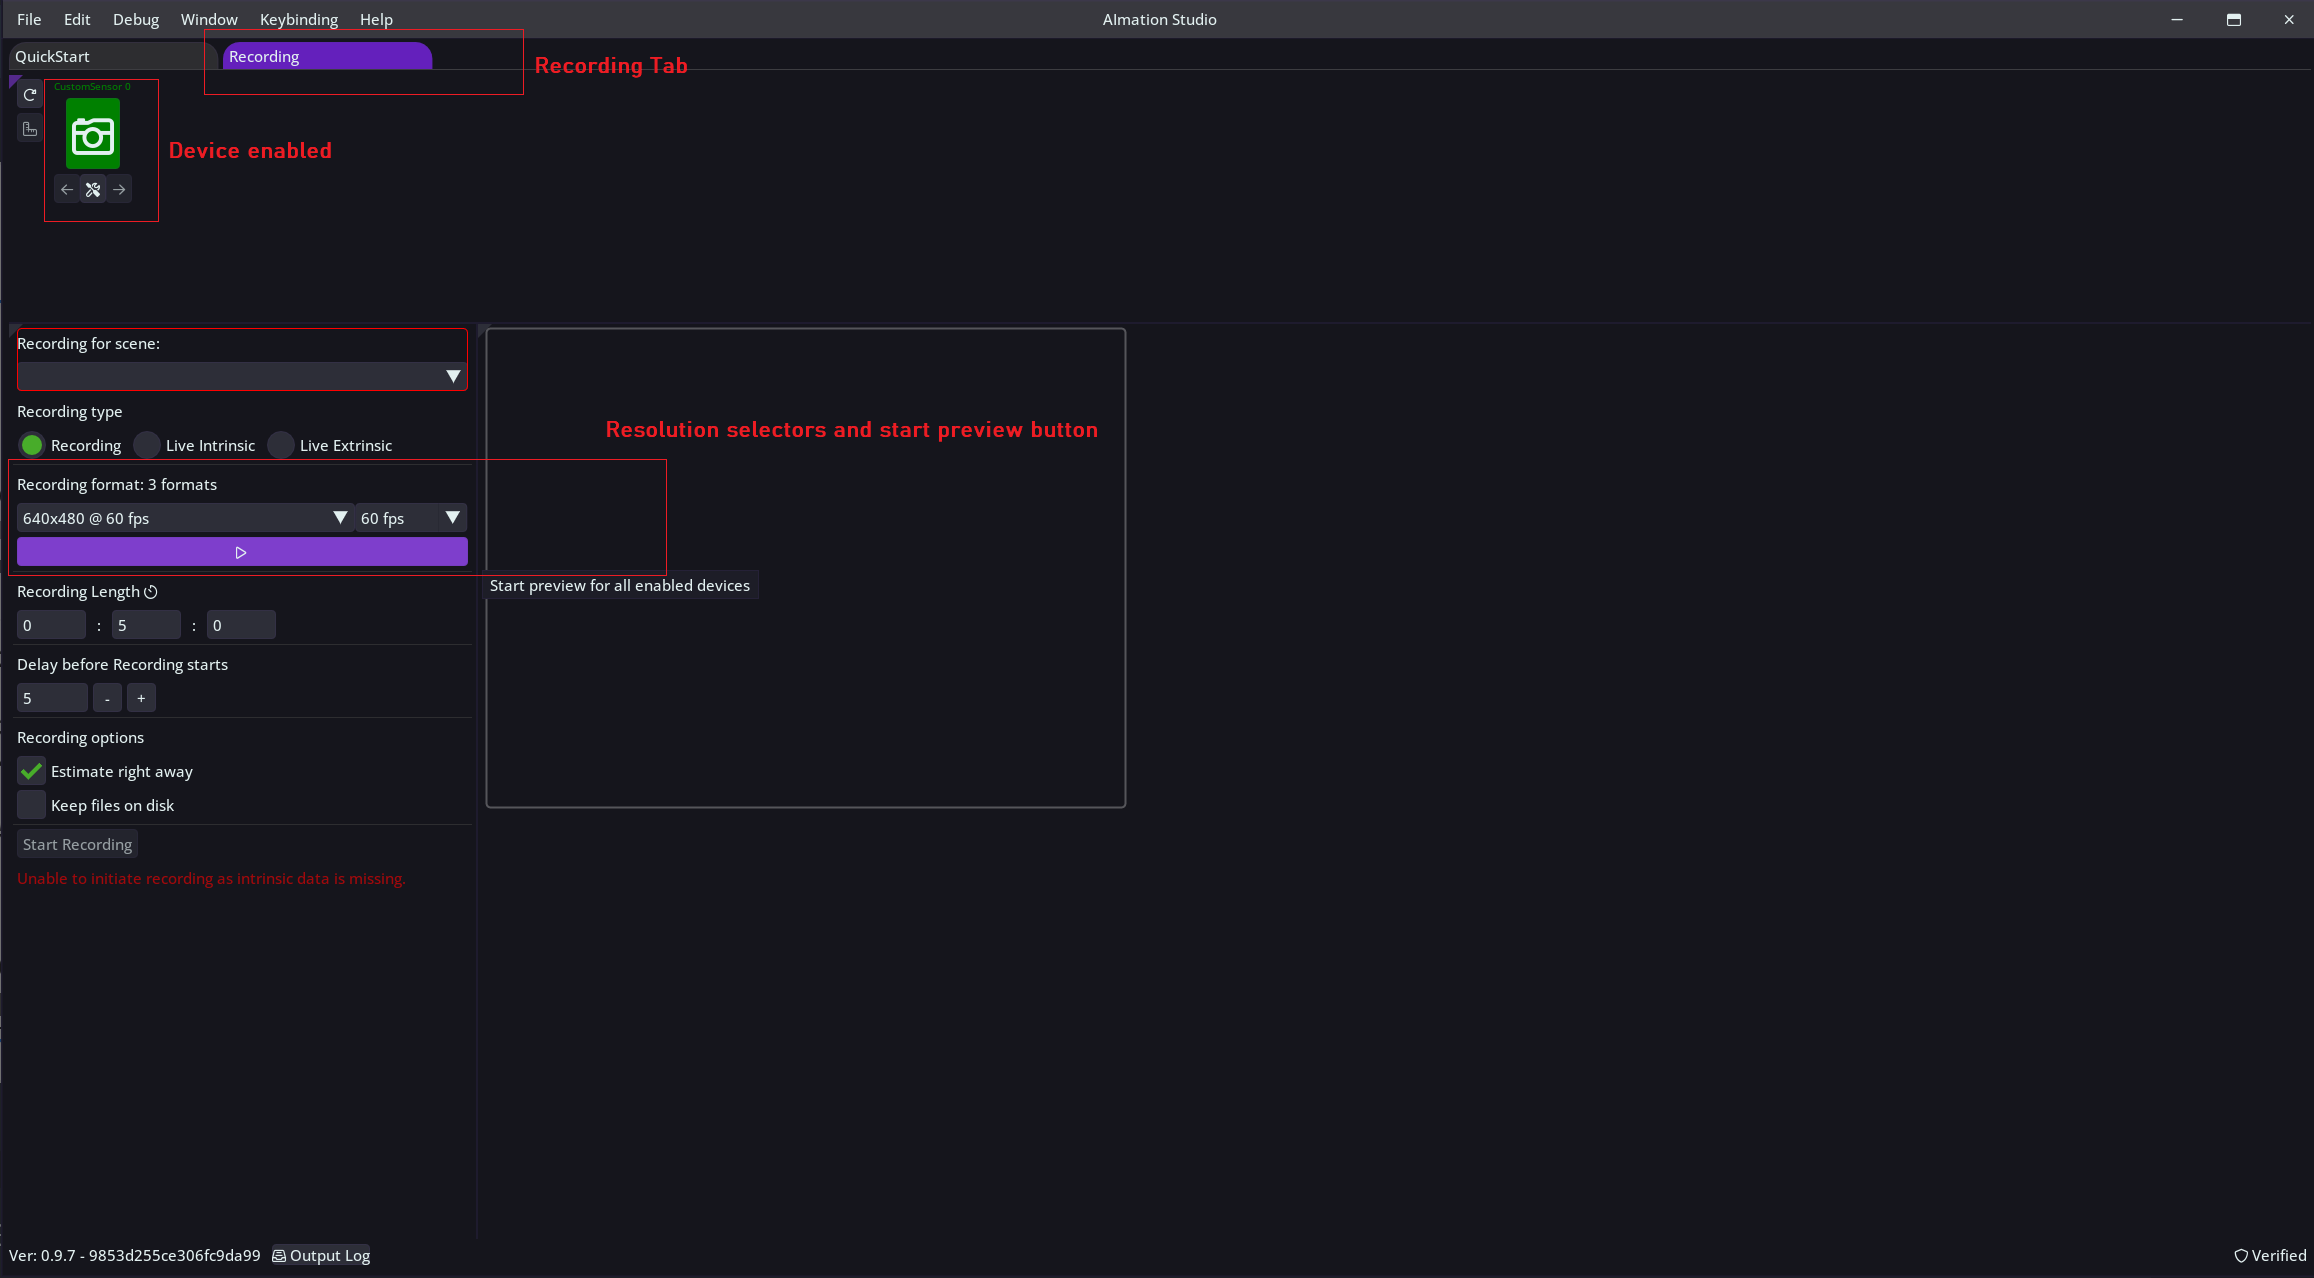
Now we are ready to physically position the camera to look at the wall where we will place our markers in two opposite corners, top left and bottom right.
We recommend to point the camera towards a corner of a room for easier measurements as well as fixing the device in place so it does NOT move.
Corners can be switched to bottom left and top right if needed
While looking at the preview, place first marker on the wall so it is in the top left corner of camera view. We want to be as precise as possible here, ideally the edge of the marker should be exactly at the edge of the view so it's not even visible in the preview.
Do the same for opposite corner.
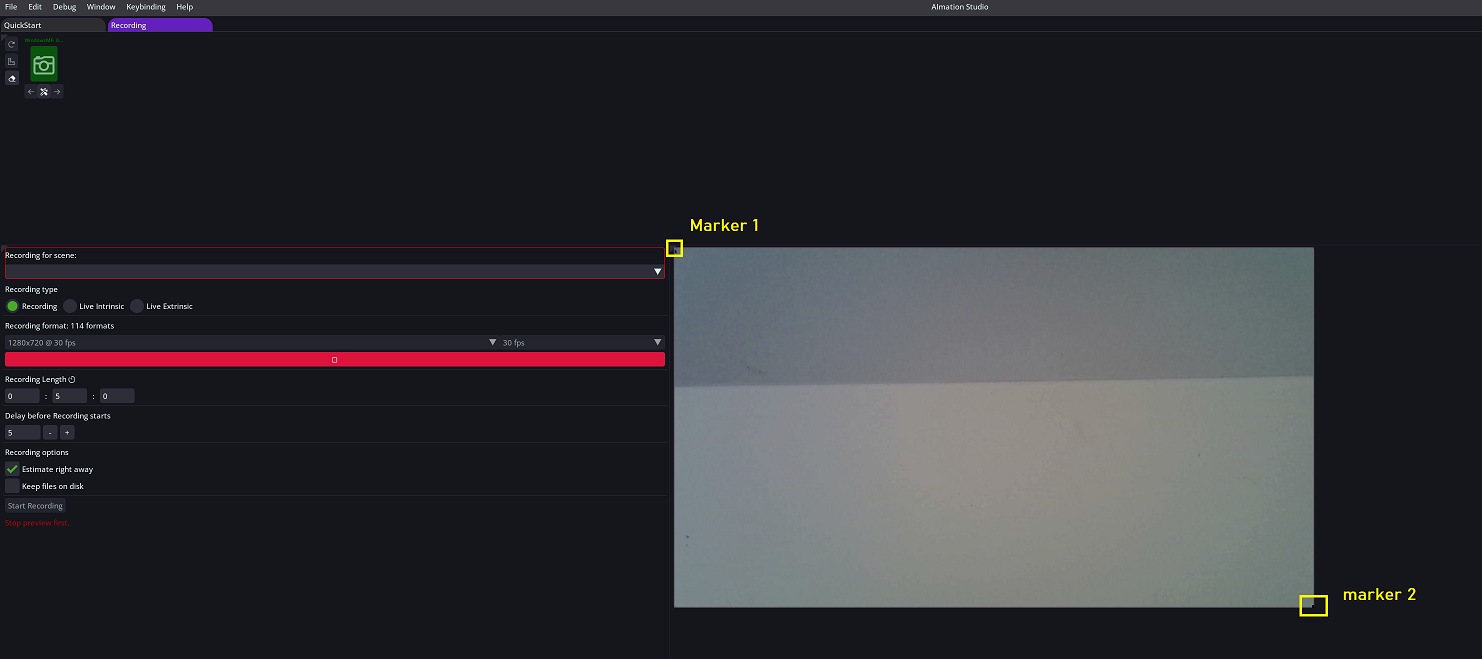
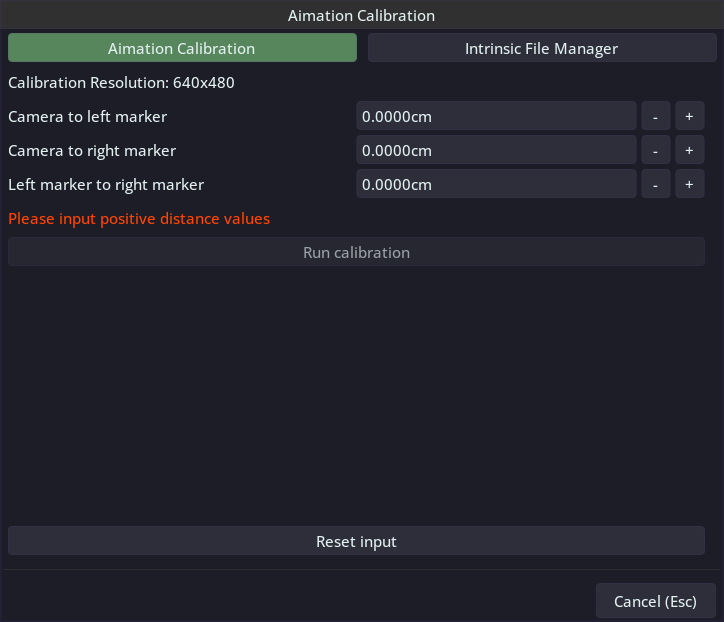
Measure three distances (in centimeters) and write them down:
- Distance between the two markers
- Distance from the edge of top left marker to the center of camera well. ( see note below )
- Distance from the edge of the bottom right marker to the center of camera well ( see note below )
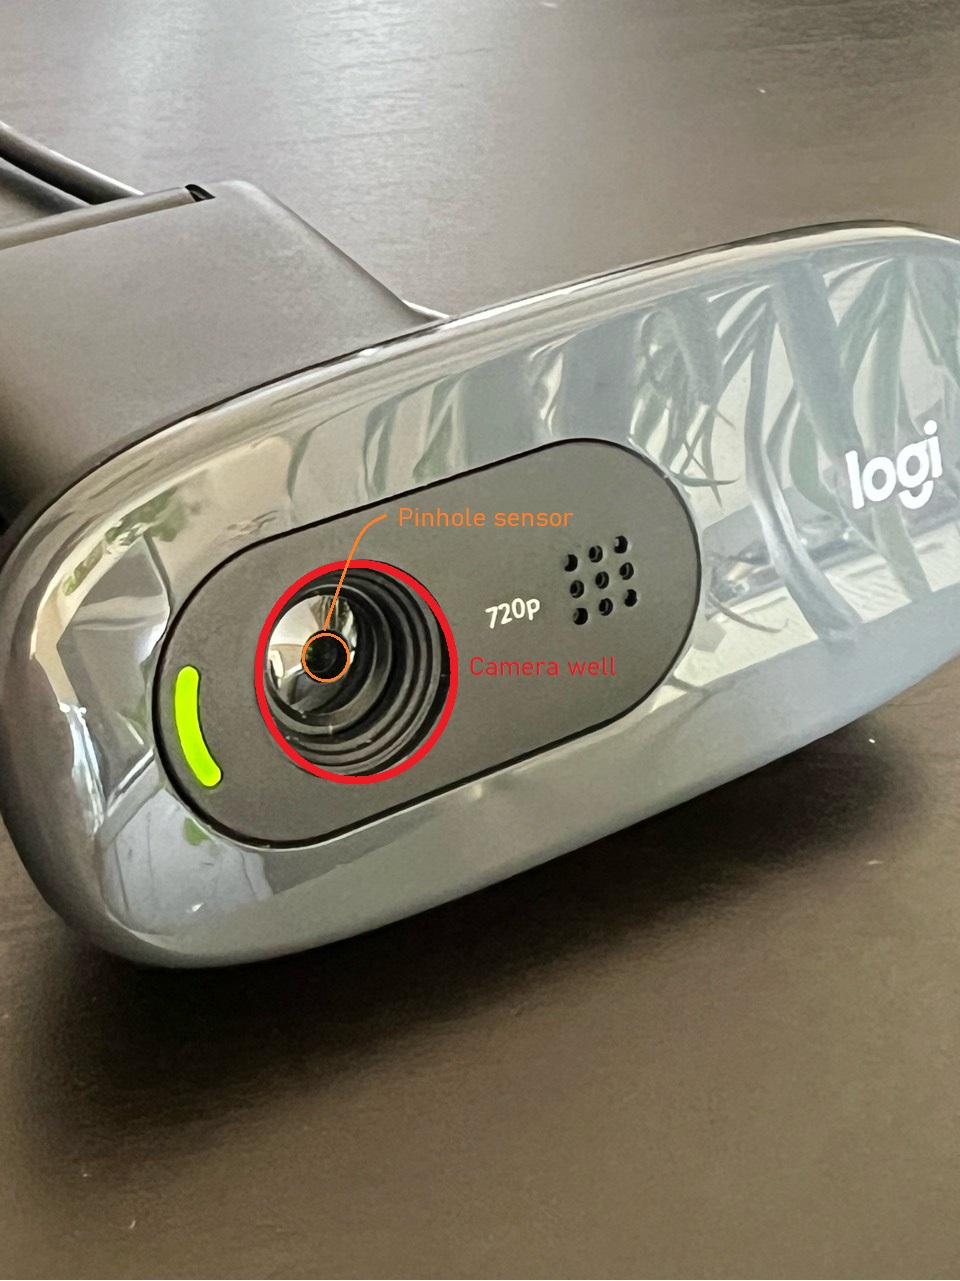
Ideally we want to measure from marker to the sensor itself, but usually it is not possible, because sensor usually lies in a little 'well' and to measure we would most of the time move the device which invalidates the markers we've placed on the wall. To fix this, measure towards the center of the well without touching the device and once you're done roughly estimate the distance between center of the well and sensor itself and add it to measurements.
See 'Lens and camera well example' two images below for real world example.
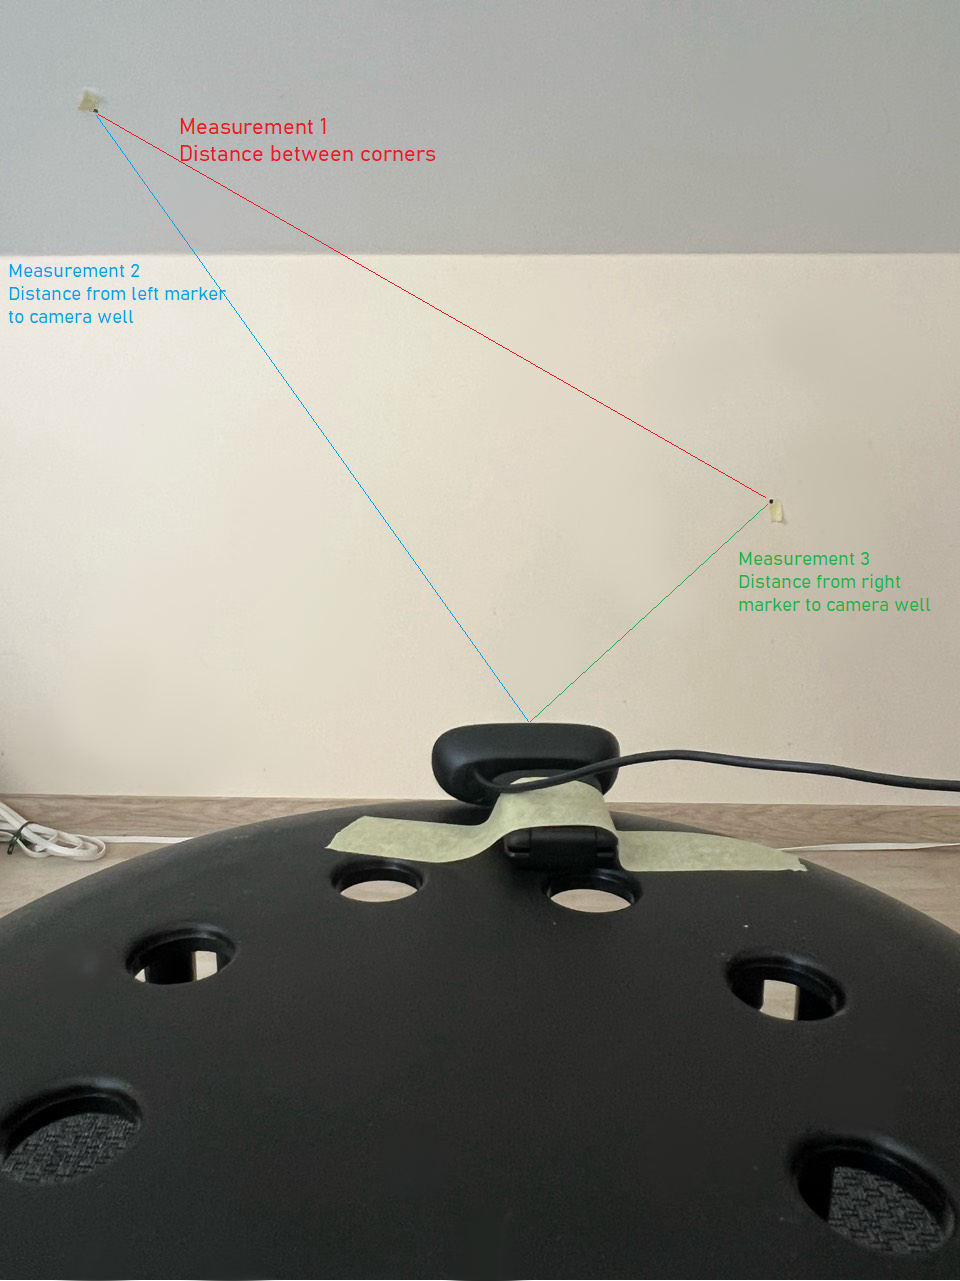
Lens and camera well example
Camera well is where the sensor lies, marked with red circle on the image, we measure towards the center of this well without touching the device because even slight movements will invalidate our marker placement.
Estimate the distance between center of the well and the sensor (marked orange on the image), in this case we estimate it to be roughly 0.2mm. Add that value to your measurements ( left marker to camera and right marker to camera respectively )
Open calibration menu
Enable only the device and select the same resolution that was used when taking the measurements (if you are following along, it should be enabled and resolution should be set).
Open camera options via the wrench button under the camera that is currently running and select 'Manual intrinsic calibration', this will open calibration UI.
Current resolution will be copied at this point, if you want to launch for another resolution, close the window and change it.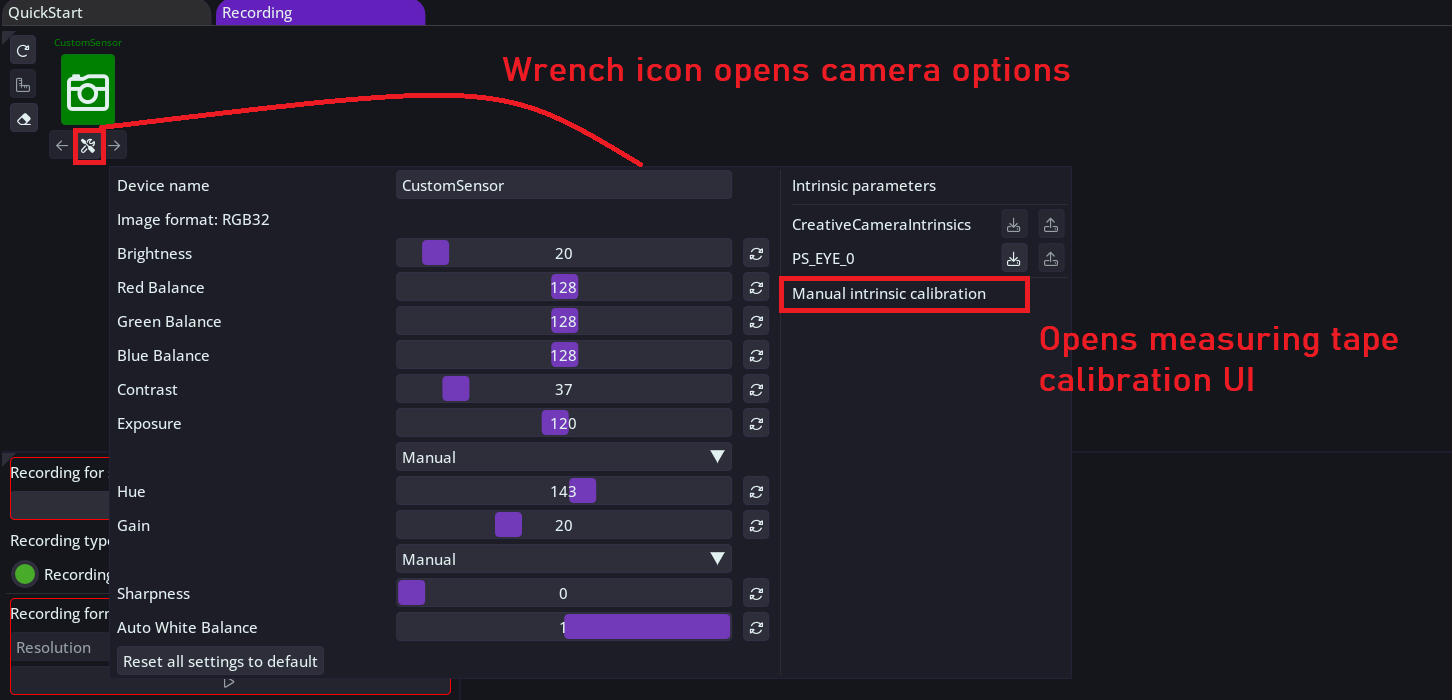
Input measurements into appropiate fields and select "Run calibration". When it is done successfully you will have an option to name the calibration file, we recommend giving it unique name to be able to identify it later if you plan on using more than one device.
If you plan to only use a single device mode, you can now move onto Recording your first animation.
In case of multi-device scenes intrinsic calibration step has to be performed for each device that will be used and once done you can move onto extrinsic calibration.
