Intrinsic using print
- Charuco Print [ Creating charuco print ]
Optionally, display the print on a monitor screen (only if its flat!). Make sure to measure square and marker size as due to how screen DPI works, they will be scaled.
Intrinsic calibration is the process of obtaining the camera matrix and distortion data for your device. This helps us find the true center of the camera and correct bent lines caused by the lens. The process involves recording images of a Charuco board from various angles and distances. The board must remain flat, so we recommend moving the camera instead of the board.
If you pin your board to some flat surface like a board that will make sure your print does not wrinkle nor move, you can then move the board itself instead.
Once you've completed the calibration for a specific resolution and zoom level, you won’t need to run it again unless those settings change.
Intrinsic recording mode
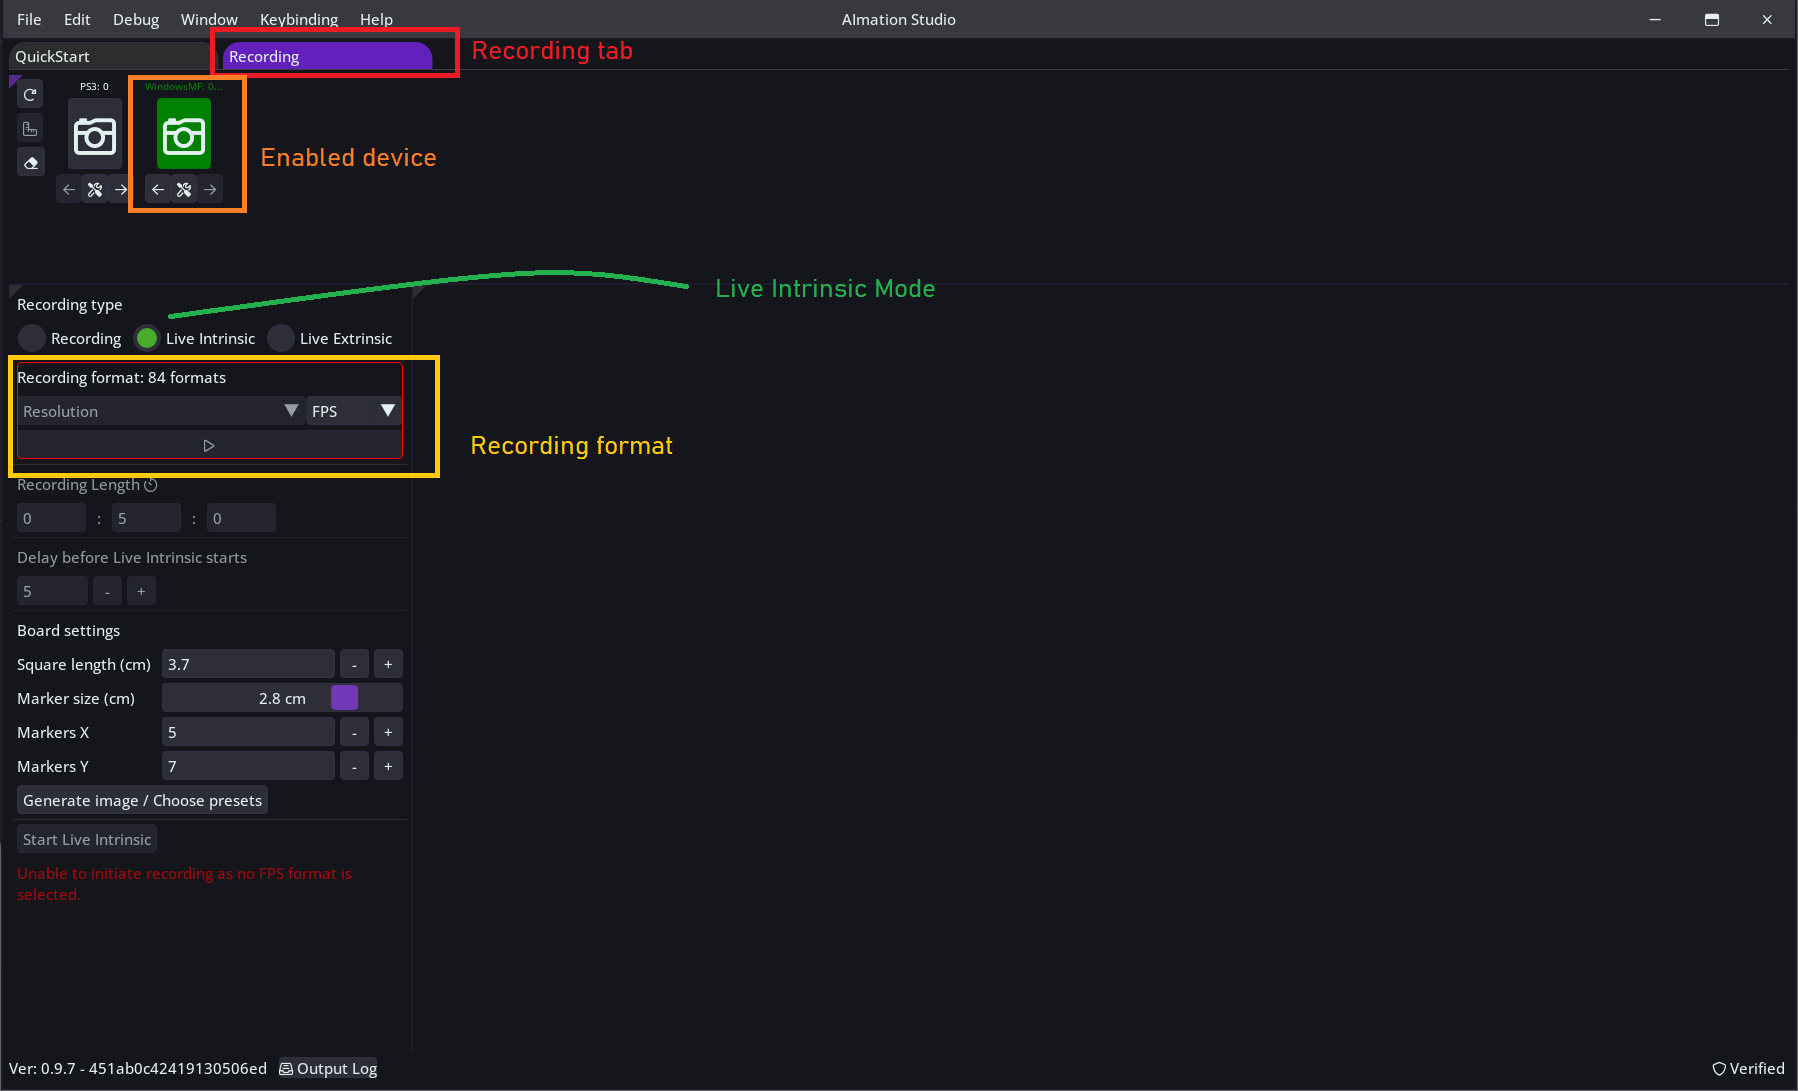
1) Navigate to the Recording tab in AImation Studio and enable the device you want to calibrate by clicking on the camera icon (enabled device turns green).
2) Switch from Recording Mode to Live Intrinsic Mode.
Start by selecting the FPS format in the 'Recording format' field, followed by your desired resolution. Try different resolutions to figure out which one works best for your environment.
When FPS and resolution are set you can preview the device by clicking on the big play button below the field.
If you do not see the advertised FPS or resolution try tweaking 'Image format' in camera settings by clicking on the wrench button below the camera
If frame server is enabled your resolution list might be limited as well What is Microsoft Frame Server

Start the device preview by clicking the play button under Recording Format. Set the device and the board in such a way that the board is visible in the preview. At this stage, we need to make sure the print is visible under the current lighting. This is an ideal moment to adjust camera parameters, such as exposure and brightness, or any other properties that the device registers in Windows. You can adjust by clicking the wrench button under the camera icon. Once you have made the necessary adjustments, you can stop the preview.
Inputting print dimensions
Input your print dimensions into Board Settings. If you've used an image generated by AImation Studio you should also have a text file that contains this data.
It is a good idea to measure squares and markers of your print to make sure that nothing has been distorted during printing, especially if you're displaying it on a monitor screen.
Once you're ready, press Start Live Intrinsic. Setting a brief delay before recording gives you time to position with the camera.
Continue recording for the full duration of the session and capture a mix of images that follows these rules:
- Make sure to capture a shot where the board edge is visible, as well as shots where there is no edge visible (very close to markers)
- Mix of shots where the camera is close to the board - at least four markers should be visible, and also from further away, with almost the entire board in view.
- Try to change the camera angle so it isn’t perfectly parallel to the board.
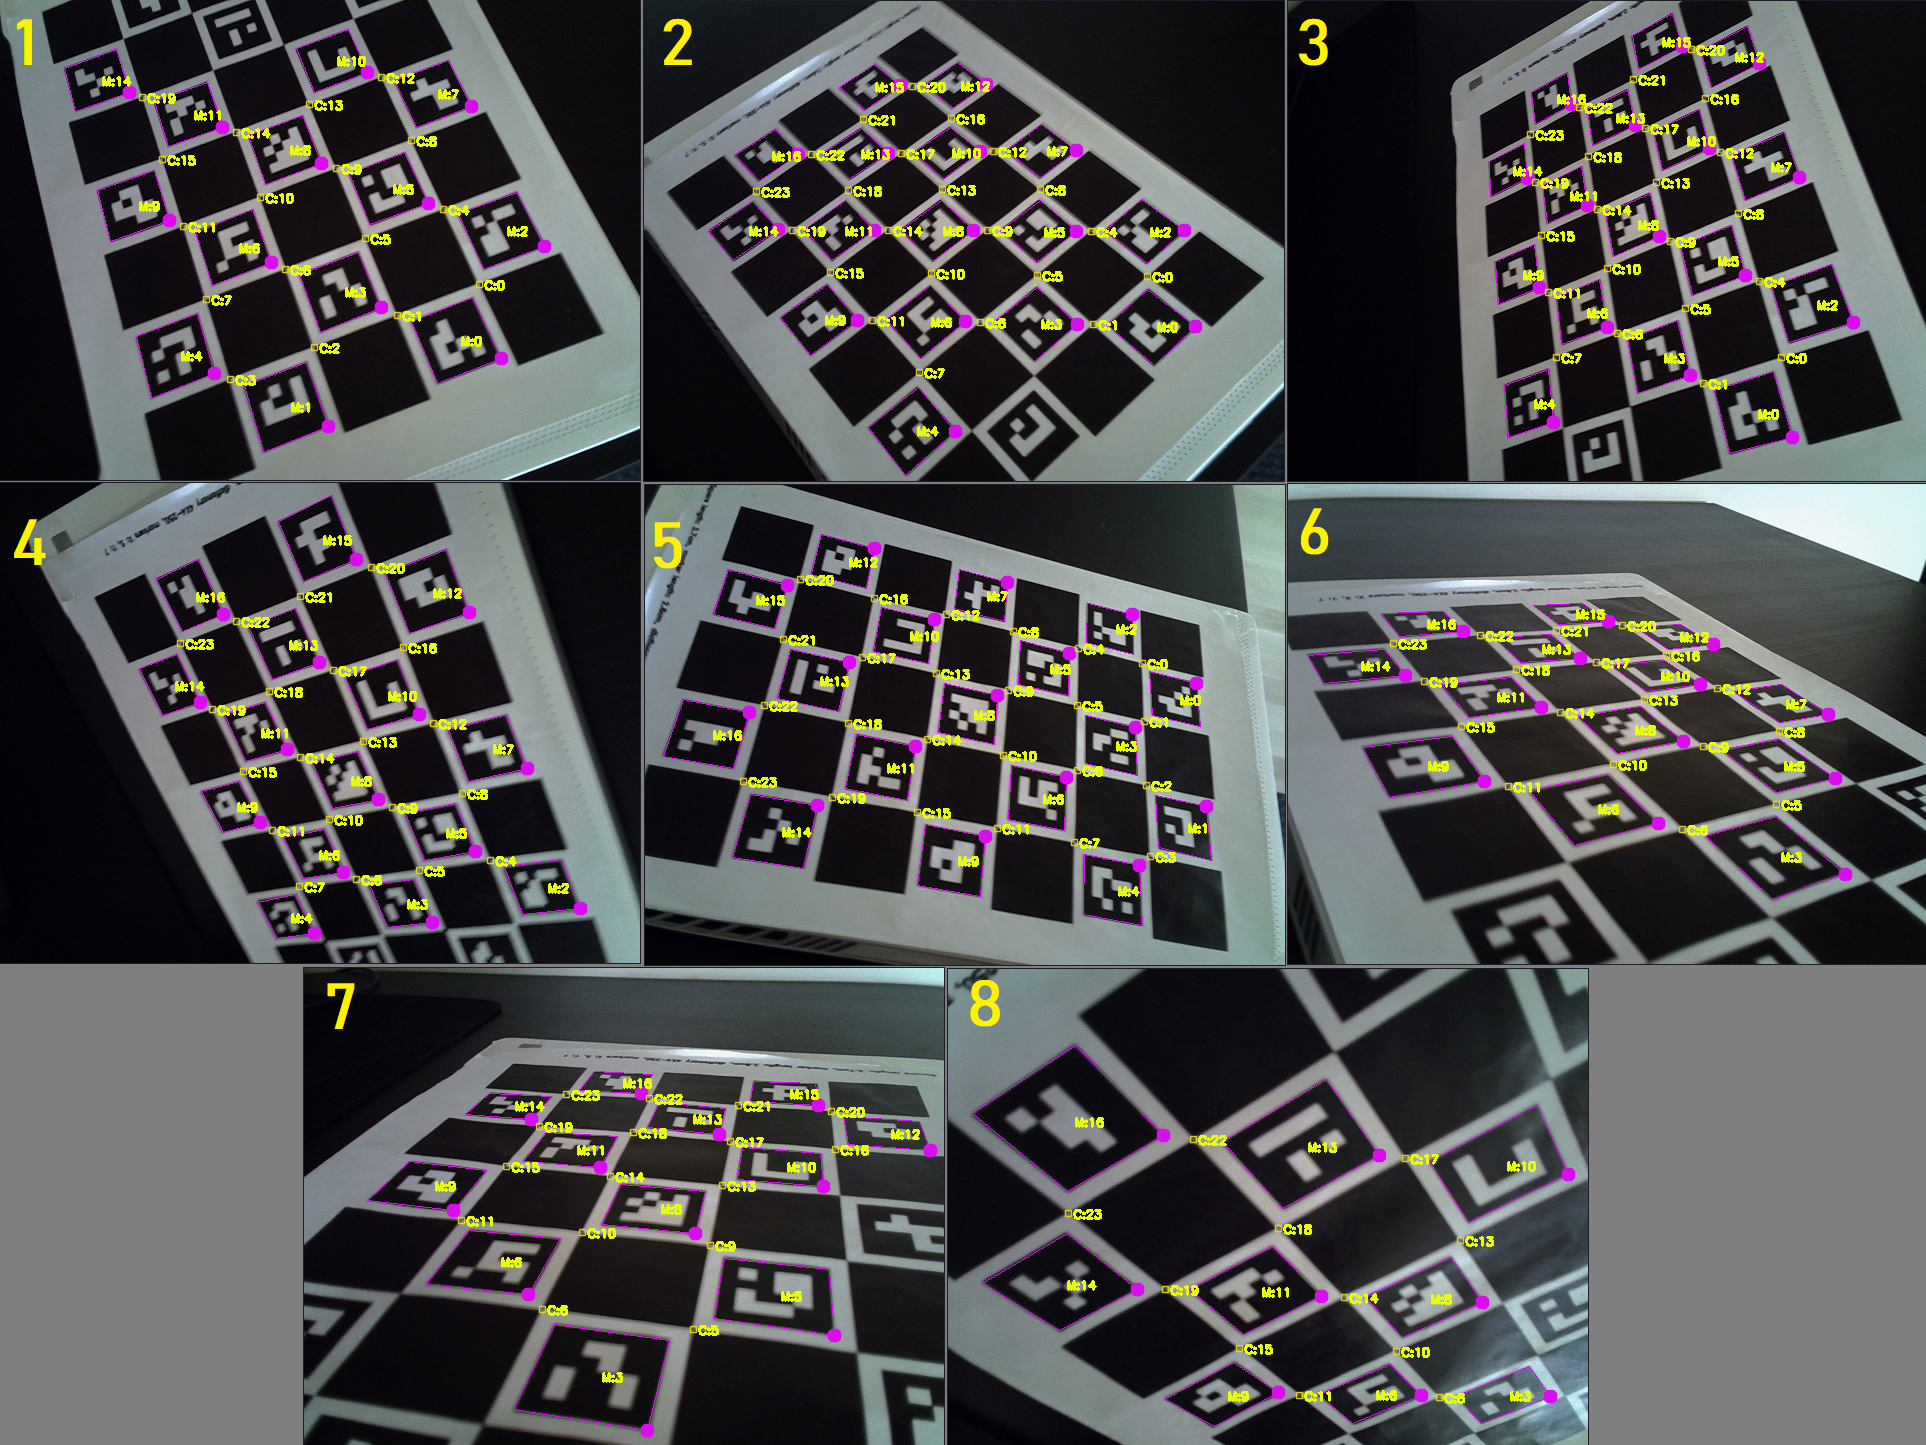
- At least half of your images should show size differences, where closer markers appear larger than those farther away. This effect is called foreshortening (see image examples below).
We suggest breaking the recording process into two parts. First, focus on capturing the board from different distances and angles. Then, concentrate on foreshortening, where closer markers look larger than those that are farther away (see example below).
The video below shows the in-app view during calibration.
Once the recording finishes, you will be prompted to use the Intrinsic Picker UI.
Example set of images pushed for calibration. Images 6, 7 and 8 represent foreshortening.

- Navigation: Left and right arrow keys
- Left mouse click on the frame box to navigate to the frame
- CTRL + Left Mouse click to add a frame to the selection
The modal window that appears is the final phase of calibration. It contains all the recorded frames from which you need to select at least six images, ideally around ten. Feel free to add more unique images if available, but try not to include images that represent the same angle and distance as those already selected. At least half of the images should showcase foreshortening.
When selecting images, look for ones with clear marker detections, where the drawn squares form accurate rectangles rather than bent shapes.
Once you're ready, press Run Calibration and wait for the process to complete. After the calibration finishes, you will see the reprojection error, which indicates the quality of the calibration. Aim for values below 1.0, with the best results under 0.5.
Alongside the reprojection error, you'll have the option to give the calibration a unique name and save it to your disk. We recommend using a distinctive name to make it easier to identify later in the system.
To load the intrinsic calibration into the device, click the wrench button located under the camera icon. Your file should appear on the right side of the pop-up. Press the Load button to import it into the device. A device with a loaded calibration will show a half-border around it.
Video example of intrinsic picker phase
If you plan to record only in a single device mode, you can move to Animation with single device.
For a multi-camera recording an additional extrinsic calibration is required (a calibration of scene) before multi-cam recording.
